


Needle Felted Heart Garland
Needle Felted Heart Garland
Needle Felted Heart Garland

Good morning, my name is Danielle, and today I’m going to walk you through a project that I really enjoyed - the Hearts Garland Needle Felting Kit from Hawthorne Handmade. Needle felting has been something I have wanted to try ever since admiring the beautiful toys and decorations I would find on Pinterest and in many Waldorf-centered social media spaces.
If you are new to needle felting like I am, this project is a great place to start. The instructions are clear and easy to understand, and the resulting product is something I am very happy to display in my children’s room.
In this article, I’ll walk you through my experience as a beginner-level felter, including some tips, tricks, and things I may have done differently.

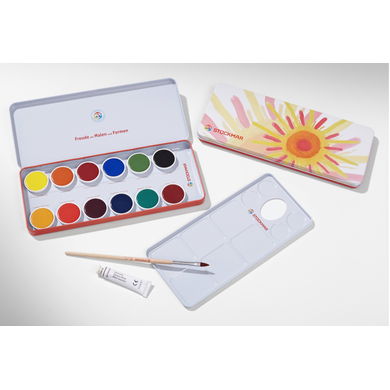
As you can see, the kit comes with four colors of wool, a length of string with a large sewing needle, a container with two felting needles, and a felt block to serve as a workspace. The first step was to create the seven white balls that go between the hearts.

This was my first ball, with the needle next to it for an idea for size. It’s looking pretty nice! Rotating as I went, I was able to create a nice solid shape. I stuck my fingers more times than I care to share so I advise you to work slowly and deliberately. I’m debating wearing soft thimbles for future projects, but it’s by no means necessary.

In the above photo you can see the result of my first attempt. The instructions advise you to set aside a good amount of extra wool, which I found to be useful once I put all my balls side-by-side. They were not at all even in size, so I made up for it by adding some of the reserved wool until they matched up well enough.

You can always add more wool, so start small, because it's a lot harder to shrink it back down. After adjusting, the results are much more even sized balls.

With the balls were finished, I started on my hearts. I found it easiest to work from the bottom up. When the top wasn’t coming out quite as smooth as I had hoped, I just gradually added more of the spare wool, just like I had done with the balls. Once again you’ll want to rotate as you work, but this particular shape requires a little extra sculpting for its definitive details. My hearts were on the slender and narrow side. At first I wasn’t too sure about it, but when it came to stringing them, I was glad I made them narrow. But we will get to that later.

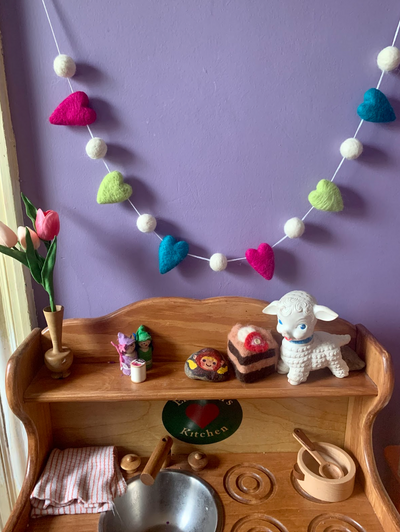
After my hearts were finished, it was time to put everything together. I was very excited to see the whole thing finished and on display.

The instructions don’t say, but I created a loop by making a slip knot at the first end of the string. I discovered with frustration that I may have been a bit overzealous when making the white balls - some of them were so dense it made it very difficult to thread them with the needle. Keep that in mind and try to make yours a little softer.
The hearts being on the narrow side was beneficial, and here’s why - the needle was longer than the heart was wide, making it easy to grab and pull through. After spacing them and tying another loop at the other end, they were ready to display.

Overall, with only working a few hours at a time, this project took me two days. I was even able to use some of the leftover wool to make extra little hearts and shapes for my daughter, who was very excited about the whole affair. Here she is helping me felt some of the blue hearts.

I recommend this kit to anyone looking to start needle felting. You can find it on the Acorns and Twigs website along with other needle felting projects and supplies. I hope this walk-through was helpful and I look forward to crafting with you again!
Other Articles
View all